By retrofitting existing fluorescent, metal halide or other high wattage fixtures in business, companies can easily reduce their lighting load by as much as 80%. If you are like most companies considering a lighting retrofit and are curious about how to properly install LED lighting in your facility, here are 6 steps to a successful LED installation.
A note to engineers: The purpose of this series of blog posts is to introduce people to LED lighting and retrofits. We will be covering and discussing a very high lever basic retrofit. For more detailed lighting subscribe to our blog for future post’s
In this comprehensive guide, you’ll see the 7 steps to a successful LED lighting retrofit here. Here are the seven steps we’ll cover throughout the resource:
- Identify high wattage fixtures and lamps.
- Investigate the possibility of removing fixtures and/or lamps.
- Consider all types of LED lamps and fixtures
- Create a proper baseline.
- Install New LED Lighting and Controls.
- Capture All Available Rebates & Incentives
- Perform Proper Measurement & Verification
Step 1: Identify high wattage fixtures and lamps
The first step with any energy conservation measure is to make sure that you have properly identified the source of the energy consumption. With lighting, this is easier than other measures. Start out by identifying what fixtures are on the most during your normal operating times and then identify the wattage of those fixtures.
Standard lighting found today.
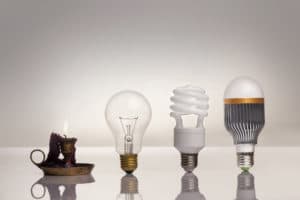
If your business is like most businesses today, chances are you have 3 or 4 lamp fluorescent fixtures. These fixtures and lamps have been the standard in the electrical industry for many years.
If your facility is older, or you haven’t upgraded in a while, it is possible that you have an older “T12” light fixture in your facility. These fixtures are some of the highest energy-consuming fixtures. These lamps can run anywhere from 45 watts to over 100 watts and come in multiple sizes, including 4′ and 8′ lengths.
If you have these fixtures or lamps, you’ve likely found that replacement bulbs are getting hard to find. That is because these fixtures were deemed obsolete a couple of years ago and are now being phased out.
You can identify the type of fluorescent lamp you have in your facility by simply removing an existing lamp and looking at the part number. Below is a picture of an example part number.
It is also possible that you will have other types of fluorescent fixtures in your facility. Not all of these lamp types are obsolete or even worth upgrading. We will talk about these cases at another time.
Types of fluorescent fixtures you might find:
- T8 both 4′ and 8′
- T5
- T5 HO (high output)
- As well as smaller size fluorescent lamps ranging between 6″ and 4′ in length.
Other lighting fixture types
Although fluorescent fixtures and lamps are the most commonly retrofitted or replaced fixtures today, other lamps you might find throughout your facility that you may want to investigate include.
- Metal Halide, typically outdoor lighting or in high ceilings
- High-Pressure Sodium (HPS)
- Standard incandescent lamps
Why energy monitoring is important.
It is important to also know how much energy your lighting is actually costing you. In order to do this, you need to know what percentage of your demand charges are attributable to your lighting and if you are going to be able to save more than just kWh through a lighting upgrade. This can be achieved by implementing a proper energy monitoring system.
Step 2: Investigate the possibility of removing fixtures and/or lamps
Removing Fixtures
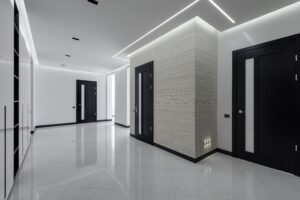
Often when new buildings are built, more fixtures are installed than necessary. This is especially true in office space buildings where tenant improvements have been done. Often times when a tenant improvement is done, walls are built and or removed and the lighting does not match, this could cause fixtures to be placed in wrong spots or in useless areas
Stay up to date with energy trends. Subscribe to the Energy Wire Blog Today.
With today’s lighting standards most offices run the risk of being over lit. In today’s computer heavy work environment, it is believed that people are not only more productive but overall happier when light levels are slightly lower. In fact studies suggest that lighting in work environments is literally draining employees’ will to work.
When doing an LED lighting retrofit, it is important to consider completely removing some fixtures first before retrofitting with new more efficient LED lamps. Why retrofit a fixture that doesn’t need to exist in the first place?
Removing Lamps from fixtures.
This is one of the most efficient ways to save energy on lighting loads without spending a ton of money on new fixtures. Typical office space buildings have 3 lamp and/or 4 lamp grid mount troffer fixtures. These fixtures can easily be retrofitted with a retrofit kit that will take either a 3 lamp or 4 lamp fixture to a new efficient 2 lamp fixture. By just doing this and not changing anything else, you can save anywhere between 30% – 50% of a lighting load.
Example.
A typical, 4 lamp, 32 Watt, T8 fixture that is turned on 10 hours a day will consume 26,880 Watts of power during a standard working month.
- 4 lamps x 32 watts each = 128 watts (not including ballast factor)
- 128 watts x 10 hours / day = 1,280 watts.
- 1,280 watts x 21 average working days a month = 26,880 watts / month
- 26,880 watts * 12 months = 322,560 watts a year or 322 kWh per fixture!
VS 2 Lamp T8
A typical, 2 lamp, 32 watt, T8 fixture under the same environment will consume on 50% less power or 161,280 watts over that same year!
REal World Example
While he was working as an energy manager for the State of Utah’s Division of Facilities and Construction Management (DFCM) Christopher Atkins, Co-Founder and CTO of Summa Energy Solutions, executed a lighting retrofit at the Utah State Tax Commission office building in downtown Salt Lake City. He was able to reduce the number of fixtures that were inside the building as well as remove 50% of the lamps that were inside the building.

Doing this, along with installing fixtures that dispersed lighting more efficiently as well as implementing daylight harvesting controls he was able to save tax payers over 70% of the lighting load of this building!
Interested in learning how much money you can save by performing a lighting retrofit? First you need to know how much of your load comes from lighting. Learn more about how to measure your lighting load and energy demand.
Step 3: Consider all types of LED lamps and fixtures
The next step in the LED lighting retrofits is the proper identification of replacement fixtures or lamps. When this is done it is important to consider many things, such as lumens, foot candles, color temperature, and Color Rendering Index (CRI) of the replacement LED. These things along with the type of housing that the LED lamp will be going into all need to be considered. Choosing the wrong LED color, for example, can drastically change the look and feel of your office or space.
Boost your return on investment of energy conservation measures through real-time energy metering
Types of led to retrofit to
When choosing your replacement LED fixtures you must also consider how it will be replaced. In recent years, replacing T8 fluorescent lamps with T8 LED lamps has become popular in commercial buildings. These lamps are typically 50% – 60% lower watts than the traditional fluorescent lamps. Retrofitting these lamps can be done in a number of different ways and it is important to get professional advice from a qualified company who is up to date on current code requirements on how to properly retrofit these lamps. There are three types of LED lamps and fixtures to consider.
Direct Wire Lamps
When LED lighting first hit the market and started being retrofitted into all different types of fixtures, it became popular to “bypass” the ballast and put 120v or 277v power directly to the tombstone or base of the lamp. This could be done because the LED lamps had “internal” drivers that would transform the power to the correct voltage for the LED’s. There are some things to consider when it comes to this.
- Safety
- Warranty & UL Listings
It has been thought that when you directly wire line voltage to a tombstone or a lamp base you could create a safety risk. The thought here is that the lamps could explode due to not being able to handle the high voltage. Fortunately, this simply isn’t true. Ballasted lamps such as linear T8 lamps are designed to run at a much higher voltage than the traditional 277v or 120v power that is found in commercial lighting. The worst case scenario is a failure to ignite or a burnt out lamp.
It is important to understand the code and UL requirements of fixtures when installing LED retrofits. Whenever you change the original equipment manufacturer’s specifications you could violate UL listings as well as warranties that may be existing.
Remote Ballast LED Lamps
A number of manufacturers offer LED lamps that have an external driver that can be easily retrofitted in place of the existing ballast or placed inside the fixture housing to power the new LED lamp. This helps assure that if a non-LED lamp is placed inside the lamp holder or tombstone then the light simply won’t turn on instead of causing failures.
Instant Start LED Lamps
In recent years manufacturers have continued to develop LED technology to making retrofitting even easier. One of these new technologies allows LED lamps to be powered by existing electronic ballasts. This allows easy installation of LED lamps by simply removing the old non-led lamp and installing a new LED lamp in its place. This can make the implementation of your LED energy conservation measure less expensive by decreasing the installation time and improving return on investment.
New Fixtures
The last thing to consider is completely replacing the fixture with new LED fixtures. These fixtures typically have better light dispersion as well as a much lower profile, allowing you to install them in places, such as underneath ductwork, where you previously could not install a light fixture. These fixtures also work great for outdoor lighting where it may be more economical to replace the whole fixture instead of just replacing the lamps.
Step 4: Create a Proper Baseline
Whenever you implement an energy conservation measure it is critical to establish a proper baseline. One of the hardest parts of implementing a lighting retrofit of any kind is measuring a proper baseline. Light fixtures themselves are traditionally installed as Plug Loads. Plug loads typically have more than just lighting fixtures on them, because of this, it can be very difficult to properly measure the return on investment for a lighting retrofit.
Magic Spreadsheets
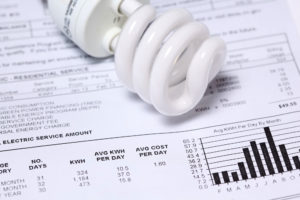
One popular way to create a baseline is by creating a spreadsheet to create your initial baseline. This is usually done by gathering 12 – 24 months of utility bills to create a benchmark. Some of the data typically gathered at this point includes:
- KW (cost and consumption)
- kWh (cost and consumption)
- Rate Schedule
- Utility Bill Total
All of these data points are important to properly create a baseline of energy consumption before any ECM is implemented.
Spreadsheet Problems
There are a number of problems that arise when you create a baseline using spreadsheets. The biggest is data entry. When you are manually entering data from utility bills errors can occur. It is very difficult for anybody to enter the amount of data needed to correctly create a benchmark for any ECM. When any error is made in the data entry process, properly calculating an ECM return on investment becomes almost impossible.
This process is also extremely time consuming. First, you have to gather all of the utility bills. This is usually done by either manually downloading them directly from the utility or by asking

for the invoices themselves from whoever manages the accounts payable. This process can not only be extremely laborious but also very frustrating as you wait for some other person or department to get the data you need.
Weather Normalization
By creating a baseline using a spreadsheet you fail to take into account a critical step in any energy management process. Weather Normalization. Utility Bills are vague in nature and do not take into consideration the weather data that effects your energy consumption. Using a spreadsheet, it is almost impossible to manually include weather normalization without creating a more complex spreadsheet than necessary.
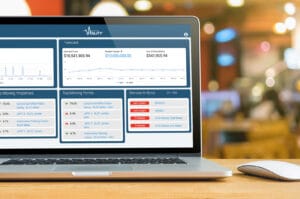
Utility Bill Automation
Luckily, this can be easily solved by automating your utility bill process. By having your utility bills automated, not only are data errors extremely low, data is normalized for weather and the bills are at your fingertips. The Vitality Utility Bill Automation feature allows you to create an ECM baseline at a click of a button. This allows you to save time and energy by providing everything you need to properly measure the ROI of your ECMs.
Real-Time Metering
Next to utility bill automation, Real-Time Metering is the easiest way to measure return on investment or ROI. By having metering installed on the proper circuits you are able to see exactly what the lighting load effects are on your energy consumption before the lighting retrofit is started.
We have seen a number of cases where lighting affects energy consumption in different ways other than expected. By having real-time metering you can see how lighting directly affects your demand and attribute a more realistic ROI.
Real-Time Metering also gives you a visual representation of your ROI. This is done by visualizing the before and after energy consumption of lighting. If done properly, you will be able to see the data on the graphs decrease (or heaven forbid increase) after your retrofit.
After you have all of the proper data collected and created a baseline that is reliable, now you can properly implement the lighting retrofit and measure the benefits.
Step 5: Install New LED Lights & Controls
As obvious as this might be, this is where most people fail in their lighting retrofit. They don’t fail here due to lack of installation knowledge or even by installing the wrong mixture of LED fixtures and lamps. Where most people fail is in thinking this is the last step.
Unfortunately, this is not the last step in successfully installing LED lights. This is however the most rewarding step. It is extremely fun to see an LED lighting retrofit take place. The before and after contrast of LED lighting can be extreme.
Proper Installation
Installation of LED fixtures can be more difficult that some people expect. It is not always as easy as removing a fixture and replacing it with another fixture or even a one for one switch out of lamps. Although, it can be that easy, if you are doing a proper retrofit and have removed lamps and fixtures then the installation of your new fixtures can cause some headaches.
LED lamps and fixtures use substantially less energy than the fixtures that may have been previously installed. Because of this, it is extremely important to have a qualified electrician verify the lighting loads and make sure that all circuits are properly sized for the new loads. It is also important to make sure that the lamps and fixtures are installed to proper manufacturer specifications.

For example, if you decided to go with retrofitting T8 fluorescent lamps to LED instant start lamps than you may want to verify that the ballast existing in the fixture is indeed a compatible ballast type. Sometimes, this can be difficult if the fixture is older than expected.
Proper Controls
When done right, one of the best parts of a lighting retrofit can be the addition of lighting controls. Controls, like occupancy and vacancy sensors, can save energy but can also increase any rebate incentives you may be getting, but more on that in the next step.
Other controls that you might want to consider are full lighting control systems that can be tied directly to your building automation system. These controls can manage occupancy and can also tie directly into your building’s operational schedule.
One of the best scheduling systems we have seen implemented is a “sweeping” lighting control. This is when the lighting control system will “sweep” off all the lights at a given time. For example, if you have a standard office building that is occupied from 6am to 10pm, you can set your control system to shut off all of the lights at midnight every night. This increases energy savings by ensuring that all lights are off when the building is not occupied. Of course all control operations can be over-ridden if necessary.
It is important to note that the addition of controls does increase the importance of proper installation. There are a number of wireless solutions available today that make the implementation of these controls easier but it is important to know what your system can handle.
Step 6: Capture All Available Rebates & Incentives
This is one of the “steps’ of energy management that really should be done out of sequence. To properly start this process you should start long before any construction is started. The reason for this is to guarantee that you properly capture any incentives that may be available. However, this is the 6th step in the process because it is important to make sure you capture your incentives and tax deductions at this stage of the retrofit.
Utility Rebates
Most utilities that provide rebates or incentives for upgrading to LED light fixtures but some of these utilities require a pre-inspection to be done before any construction or retrofitting is done. This is to insure that a proper retrofit was done. However, it is critical to make sure that you capture all available rebates and incentives to you at this stage.
Pacific Corp’s Rocky Mountain Power has created a program to help manage and promote the installation and adaption of LED in the market place. Their Watt Smart program offers rebates for any kWh reduction. Other utilities across the nation have also implemented rebate or incentive programs. It is important to hire a proper electrician that can help you capture these rebates. Some utilities require a utility approved contractor to do installs for all rebates.
For details on what rebates may be available in your area, check out the DSIRE website for more information.
Tax deductions
As important as utility rebates are, tax incentives are just as important. It is important to consult with your CPA or tax professional to verify if there are any tax incentives you could qualify for.
For example, some businesses could qualify for a special tax deduction know as the 179D deduction for LED lighting. This particular tax deduction could help businesses deduct up to $1.80 per square foot of their energy conservation measures and as much as $0.60 per square foot for upgrading to LED.
Other tax deductions may be available. Sometimes, when installed properly, LED lighting upgrades can also qualify for an accelerated depreciation schedule. These tax deductions help reduce the overall cost of the LED lighting retrofit as well as increase the return on investment of your upgrade.
Net Cost
Having properly captured all available incentives and researched any available tax deductions that may important it is very important to get a proper calculation of your final net cost for install. This number will be the starting point of the next and final step in the process, performing proper measurement and verification.
Step 7: Perform Proper Measurement & Verification
One of the most critical steps to any energy conservation measure is performing a proper measurement and verification, so you know exactly what your return on investment is.
What is measurement & verification?
Measurement & Verification or M&V is a very critical step in any energy management process. According to Noresco, M&V is defined as follows:
Measurement and Verification (M&V) is a formal, systematic process for determining the functional and energy saving performance of a building’s energy-using systems
According to the United States Department of Energy, measurement & verification, which is often referred to “Energy Savings Performance Contract” (‘ESPC’), is broken down into a four step process. These steps include.
- Determining baselines and estimated savings.
- Developing the M&V plan.
- Developing the post-installation M&V report, which is part of conducting post-installation M&V activities.
- Performing annual M&V, which is part of the annual M&V activities.
We have already covered creating a proper baseline during the 7 steps to successfully installing LED lighting, so for purposes of this post, we are going to focus mostly on steps 3 and 4.
It is also important to note that according to the Department of Energy there are three phases of the ESPC process.
Developing Post-installation M&V report.
This step in the measurement and verfication process can be quite daunting and therefore it is the step in any energy conservation measure project that is most often skipped or completely overlooked. To properly create an M&V report you may need to complete a number of activities which include:
- On site surveys
- Inspections of the ECM
- Spot measurements
- Metering.
This report should also take into consideration the baseline that was created before the project was implemented.
This report can be as simple or complex as you want. At the end of the day, the thing to keep in mind here is that you are trying to measure the return on investment for your ROI. Unless you have executed your ECM through performance contracting. There is no need to worry about creating an overly complex report.
There are a number of ways to create your M&V report. Many people start with a spreadsheet similar to what was used to create the base line and then update the spreadsheet monthly to see if there are any savings. There are a number of problems with doing it this way, which include weather normalization and data integrity.
The easiest way to create an M&V report is through ongoing energy metering. Energy metering should be a critical step in any energy conservation measure. By having proper metering and an energy management software such as Vitality, you can automatically track and create your own M&V report no matter how complex it needs to be.
Performing Annual Measurement & Verification
At the minimum, the equipment installed during the energy conservation measure should be inspected and maintained properly by either yourself or the company who installed the equipment. During this time the company should create for you their own measurement and verification report.
It is important during any maintenance and inspection that you assign your representative to assist the installing company during their time on-site. This is to help create as independent and unbiased report as possible.
You may also want to consider hiring a third party company to assist with the measurement and verification. Some government incentive and rebate programs require third party M&V, so it is also important to make sure you are meeting all incentive requirements.
By having a comprehensive metering platform with the right energy management software, this whole process can be automated making your measurement and verification processes more simple, allowing you to focus on finding and executing your next ECM.